

Working with TYPO3 4.2 and TemplaVoila 1.3.7
Introduction
I’m going to start with my conclusions this time instead of having them at the end of the article. What I’ve come away with from this experience is that TYPO3 is not as bad as it seems when you first get started. Using TemplaVoila it’s quite easy to bypass TypoScript hell.
However, I still feel that the system is just making things more complex than they need to be. For instance if place holders were used within the HTML a lot of the complexity of TemplaVoila would be unnecessary.
Is a massive tool with a complex interface for automating a process that was too complex to begin with the correct remedy? I just get the feeling that something is fundamentally wrong here, especially when I compare with MODx which feels like a much more elegant solution, albeit not as feature complete.
If for instance MODx-like placeholders were placed in the template files I could just put them where they are needed and “compile” the template. Instead I’m stuck with managing a heavy interface for the better part of an afternoon, clicking my fingers off, completely unnecessary.
In the end though, TYPO3 will probably be the best choice for managing big multi language sites. Just don’t expect the content creators to be up and running with the back end interface before lunch. Give them some training and a month or two and then maybe…
Tutorial
First of all, I put the two HTML listings in the prior tutorial in the \fileadmin\templates\cocktails directory in my TYPO3 install folder. Note though that for TemplaVoila to work with the complex box you need to wrap it in a div, like this:
<div><div class="box_t"><div class="box_l"><div class="box_r">
<div class="box_tl"><div class="box_toponly_tr"><div class="box_toponly_bg">
  <h5>Cocktails von A-Z:</h5>
</div></div></div></div></div></div>
<div class="box_lower_b"><div class="box_lower_l">
<div class="box_lower_r"><div class="box_lower_bl">
<div class="box_lower_br">
  A B C
</div></div></div></div></div></div>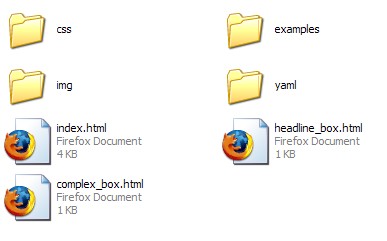
This is the contents of my index.html:
<!DOCTYPE html PUBLIC "-//W3C//DTD XHTML 1.0 Transitional//EN"
"http://www.w3.org/TR/xhtml1/DTD/xhtml1-transitional.dtd">
<html xmlns="http://www.w3.org/1999/xhtml" xml:lang="en" lang="en">
<head>
<title>Coctail Seite</title>
<meta http-equiv="Content-Type" content="text/html; charset=utf-8"/>
<link href="css/layout_2col_left_31.css" rel="stylesheet" type="text/css"/>
<!--[if lte IE 7]>
<link href="css/patches/patch_2col_left_31.css" rel="stylesheet" type="text/css" />
<![endif]-->
</head>
<body>
<div id="page_margins">
<div id="page">
<div id="header"></div>
<div id="main">
<div id="col1">
<div id="col1_content" class="clearfix">
<div class="box_t"><div class="box_b"><div class="box_l"><div class="box_r"><div class="box_bl">
<div class="box_br"><div class="box_tl"><div class="box_tr"><div class="box_bg">
<h5>Herzlich Willkommen bei der Cocktailseite!</h5>
</div></div></div></div></div></div></div></div></div>
<br>
<div class="box_t"><div class="box_l"><div class="box_r">
<div class="box_tl"><div class="box_toponly_tr"><div class="box_toponly_bg">
<h5>Cocktails von A-Z:</h5>
</div></div></div></div></div></div>
<div class="box_lower_b"><div class="box_lower_l">
<div class="box_lower_r"><div class="box_lower_bl">
<div class="box_lower_br">
A B C
</div></div></div></div></div>
</div>
</div>
<div id="col3">
<div id="col3_content" class="clearfix">
<div class="box_t"><div class="box_l"><div class="box_r">
<div class="box_tl"><div class="box_toponly_tr"><div class="box_toponly_bg">
<h5>Cocktailseite Menu</h5>
</div></div></div></div></div></div>
<div class="box_lower_b"><div class="box_lower_l">
<div class="box_lower_r"><div class="box_lower_bl">
<div class="box_lower_br">
<ul>
<li><a href="">Anmeldung</a></li>
<li><a href="">Cocktailrezepte</a>
<ul>
<li><a href="">Sommercocktails</a></li>
<li><a href="">Die 10 teuersten Cocktails der Welt</a></li>
</ul>
</li>
<li><a href="">Fingerfood</a></li>
<li><a href="">Perfekte Cocktailparty</a></li>
</ul>
</div></div></div></div></div>
</div>
<div id="ie_clearing"> </div>
</div>
</div>
</div>
</div>
</body>
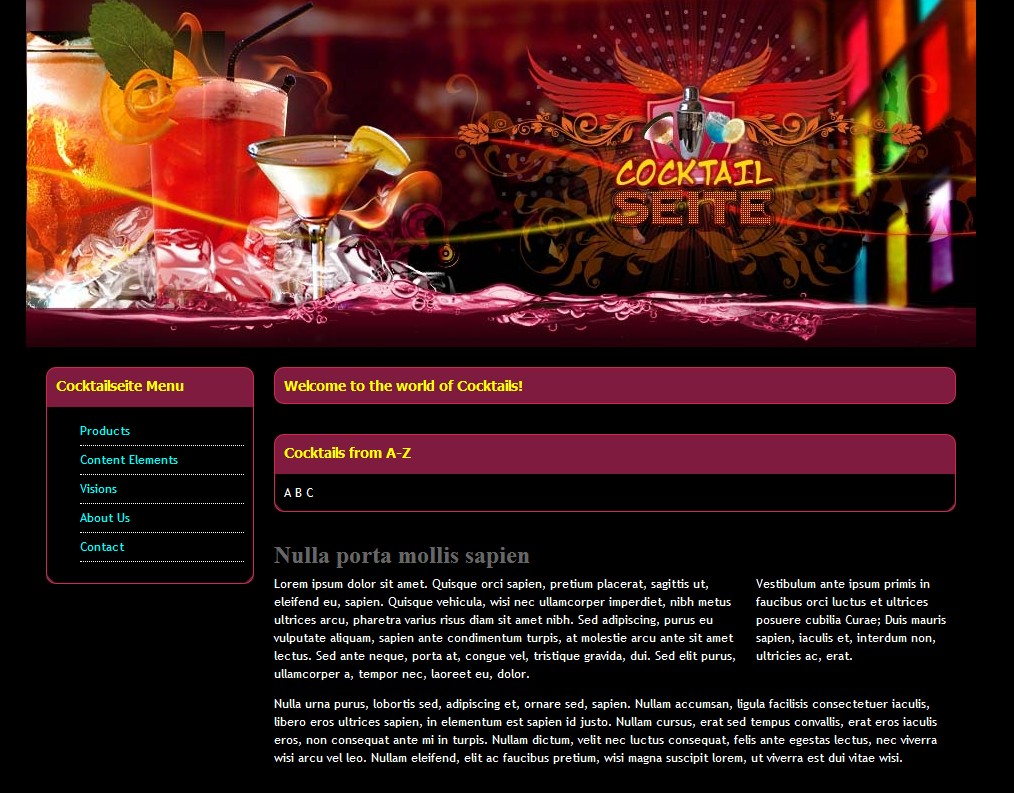
</html>If you look hard you can recognize the HTML of the rounded boxes from the prior tutorial.
Let’s go to the TYPO3 backend:
1.) Go to Web -> TemplaVoila
2.) To the right you will see NEW SITE WIZARD and a button with Start wizard now! caption. Click it.
3.) STEP 1: Select the template HTML file. So I click the [Choose as Template] link for fileadmin/templates/cocktails/index.html.
4.) STEP 2: Enter default values for new site. I just put Cocktails in the Name of the site field, admin in the Editor username field and click Create new site.
5.) Step 3: Begin mapping. Simply click the Start the mapping process button.
6.) You end up on a page with some tabs, Information, Header Parts and Mapping, go to Mapping. It looked like this for me:
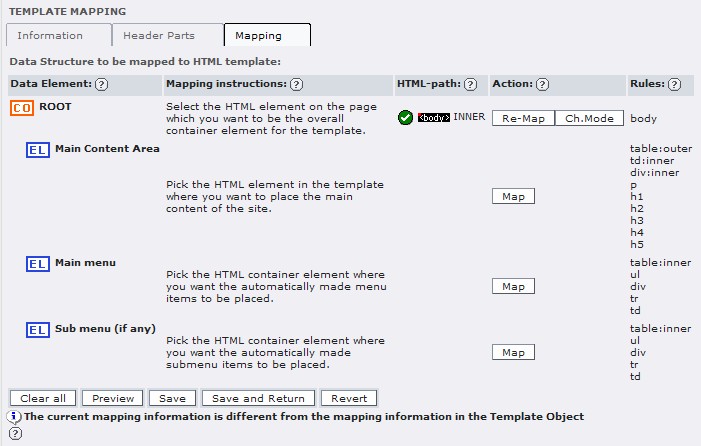
7.) Click Map for Main Content Area. You will now see the Exploded Visual editor. I’m using a YAML two column layout so I hover with the mouse until I see the div with id col1_content. Click it. You will now see a drop down with choices in the Action column, choose the default INNER and click set.
8.) At this point I got a warning and my ROOT node was all of a sudden not mapped so I clicked map on it and chose the body tag. When I came back to the template mapping area all was well.
9.) click Map for the Main menu and pick the first ul and choose INNER. I did the same with the Sub menu but this time I chose the bottom ul. I got the No content found! warning when I got back to the main mapping page, just ignore it if you get it too.
10.) Click Save or Save and return, if it complains that you have to set the header stuff just do it (under the Header tab) and click Set followed by Save and return.
Next is setting up the menu because the wizard just didn’t get it, the menu ended up being somewhat screwed. I’ve just taken info from Kasper’s TemplaVoila tutorial here and modified it somewhat.
Go Template -> Root Page (In my case it’s called Cocktails) -> Info/Modify in the top drop down. Click the Click here to edit the whole template record link at the bottom. Paste the following into the Setup text area (replacing what was there before):
# Menu 1 cObject
lib.menu_1 = HMENU
# First level menu-object, textual
lib.menu_1.1 = TMENU
lib.menu_1.1 {
 wrap = <ul> | </ul>
 # Normal state properties
 NO.allWrap = <li> | </li>
 NO.stdWrap.htmlSpecialChars = 1
 # Enable active state and set properties:
 ACT = 1
 ACT.stdWrap.htmlSpecialChars = 1
 ACT.allWrap = <li> | </li>
}
# Second level menu-object, textual
lib.menu_1.2 = TMENU
lib.menu_1.2 {
 wrap = <ul> | </ul>
 # Normal state properties
 NO.allWrap = <li> | </li>
 NO.stdWrap.htmlSpecialChars = 1
 # Enable active state and set properties:
 ACT = 1
 ACT.stdWrap.htmlSpecialChars = 1
 ACT.allWrap = <li> | </li>
}

config.spamProtectEmailAddresses = 1

page = PAGE
page.typeNum = 0
page.10 = USER
page.10.userFunc = tx_templavoila_pi1->main_page
The only extra here compared with the original tutorial is the wrap = <ul> | </ul> lines. They will ensure that our list menus are wrapped in ul tags.
Click Save and Close document (the small floppy with an x in it).
Next go Web -> Page -> right click Cocktails (or Root Page) -> View DS/TO -> Right click the small DS icon next to Main Template at the top -> Edit.
Make sure that the Data Structure XML looks like this:
...
<field_menu type="array">
    <tx_templavoila type="array">
        <title>Main menu</title>
        <description>Pick the HTML container element where you want the automatically made menu items to be placed.</description>
        <sample_data type="array">
            <numIndex index="0">[Menu goes here]</numIndex>
        </sample_data>
        <eType>TypoScriptObject</eType>
        <tags>table:inner,ul,div,tr,td</tags>
        <eType_EXTRA type="array">
            <objPath>lib.mainMenu</objPath>
        </eType_EXTRA>
        <TypoScriptObjPath>lib.menu_1</TypoScriptObjPath>
    </tx_templavoila>
</field_menu>
<field_submenu type="array">
    <tx_templavoila type="array">
        <title>Sub menu</title>
        <description>Pick the HTML container element where you want the automatically made submenu items to be placed.</description>
        <sample_data type="array">
            <numIndex index="0">[Menu goes here]</numIndex>
        </sample_data>
        <eType>TypoScriptObject</eType>
        <tags>table:inner,ul,div,tr,td</tags>
        <eType_EXTRA type="array">
            <objPath>lib.subMenu</objPath>
        </eType_EXTRA>
        <TypoScriptObjPath>lib.menu_2</TypoScriptObjPath>
    </tx_templavoila>
</field_submenu>
...
Note
That should’ve taken care of the menu. Test by clearing the cache through clicking the lightning bolt at the very top right corner and refresh the frontpage.
Let’s follow up with our two content boxes:
1.) Go File -> Filelist -> Browse to the cocktails folder in the file tree.
2.) Right click the icon to the left of headline_box.html, select TemplaVoila. You end up with the same interface we used to map the main page with. Click Clear all and then Map to map the ROOT. Next click the topmost div tag, this time you choose OUTER in the Action drop down, click Set.
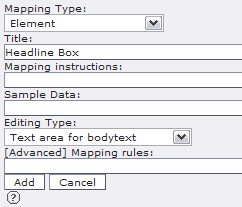
3.) There is a text field prepopulated with [Enter new fieldname]. Put field_headlinebox_content there or something similar. Click Add. My form looked like to the left before I clicked the Add button at the bottom.
4.) Click Map in your new Headline Box Field and select the h5 tag. This time you choose INNER.
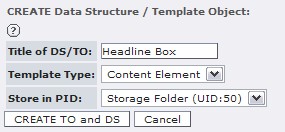
5.) Click Save as. My create form looked like to the right before I submitted it by clicking CREATE TO and DS:
6.) Go Web -> Cocktails -> Create New Element (the page icon with a green + on it next to the trash can). Scroll down until you see the Headline Box under Flexible content, click the icon.
7.) In the Headline Box write something like Welcome to the world of Cocktails!. In the Header field you could write Welcome or something. Click save and close document, refresh the cache and the front page.
Redo the above but this time for the advanced box, the only difference is that you need to map both the headline and the main content area in the black bottom area.
Related Posts
Tags: css, html, templavoila, TYPO3